Cats, Cooking, and Life!

Oven-Baked Fish & Chips


Here's something I've been making, like, forever and have introduced to the Wonder Woman and Da Original Gangstur.  They love it!

Being baked with a minimum of oil, it's a relatively healthy dish, at least from the point of view of being low-fat.  It's still relatively high in carbs, though, so take your pick as to which discipline you want to follow.

This recipe feeds 3 or 4 people, depending on how hungry you are.

Ingredients:
French fries
Fries, seasoned and ready to bake
  • 2 large potatoes, about 1 kg.  Use Russetts, or other "baking" style potatoes.  These make the best fries.
  • 15ml oil (1 tbsp)
  • Salt and pepper and / or other seasoning as you prefer.  We all like a "garlic with herbs" shaker that Wonder Woman picked up somewhere but can't remember where.

Fish
  • 400g fish.  Traditionally, cod is preferred, although salmon is an excellent choice.  But any firm-fleshed fresh fish will be fine.
  • 60g flour
  • 5 ml dry mustard
  • 1 egg
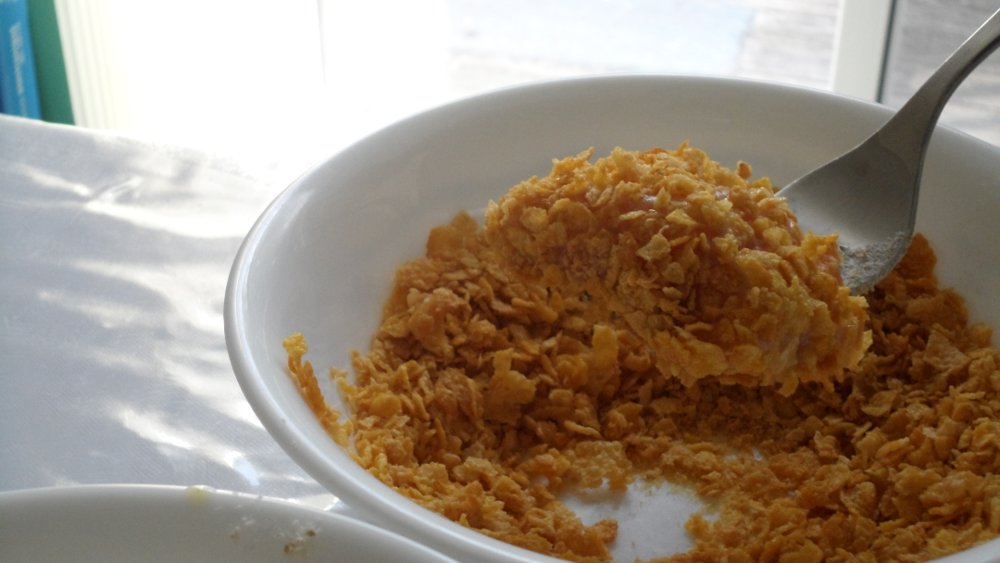
  • 150 ml corn flake crumbs.  either crush them yourself, or purchase a box of crumbs.  Alternatively, bread crumbs are acceptable but not as good.
  • 1 tbsp oil

The salmon pieces with the egg wash, crumbs (top right) and flour

To prepare:


  1. Preheat the oven to 225 C (475 F).  This dish does best in a hot oven.
  2. Scrub the potatoes or peel them.  We like to eat the peel, plus it's healthier for you.
  3. Slice the potatoes into fries.  Don't make them too small.  Put them into a large bowl, add the oil and toss gently to coat.
  4. Arrange the fries in a single layer on a cookie sheet.  Put in the oven and bake for 40 minutes.  Turn them over every 10 minutes.
  5. Get out three bowls.  Into the first bowl, mix the flour and dry mustard.  The second bowl, lightly mix the egg and some water into an egg wash.  The third bowl contains the crumbs.
  6. Coat the bottom of a baking dish with the oil.
  7. Rinse the fish well and pat it dry with paper towels.  Cut the fish into serving-size pieces.
  8. Here's the fun part.  With a fork, coat each piece with the flour mixture.  Shake off any excess.  Put the pieces into the egg wash.  Shake off the excess again, and dredge in the crumbs.  Then arrange the pieces in the baking dish.
  9. When the fish has been in for 40 minutes, then add the fish to the oven.  Let it bake for 10 minutes, and flip the pieces after 5 minutes.  The fish should be flaky.
  10. Serve while still piping hot.
The fish, coated and ready to bake
Coleslaw is a traditional side-dish for fish and chips.  Malt vinegar is a good topping for french fries, but ketchup is good for the younger ones.  Squeeze a wedge of lemon on the fish.  Tartar sauce is OK, too, but we prefer the lemon.

Note: I've made this many times.  Something with the potatoes eventually coats the cookie sheet, even if it is non-stick, so much so that the fries eventually stick to the pan.  I found my best strategy is to use a cheap pan and replace if occasionally.  Save your good cookie sheet for making cookies and other good stuff!

Does Bow-tie Calico approve?  She loves the fish, ignores the chips and really hates the wedge of lemon.

Ichigo Daifuku

Ichigo daifuku is a Japanese dessert with
strawberry and anko.   It is a strawberry coated in sweet red bean paste and then coated again in starchy pastry.  The balls are rolled in corn starch to prevent them sticking together or to your fingers.

This is a commonly available in Japanese bakeries.  We first tried it in a small bakery in a train station in Tokyo.  They're a bit finicky to make because they're sticky but look gorgeous and taste divine.  They are supposed to bring good luck to all those who eat them.


Ingredients
  • 6 fresh strawberries, small to medium size
  • 150 g (5.29 oz) anko - sweet red bean paste
  • 100 g (3.53 oz) mochiko - glutinous rice flour
  • 30 ml (2 tbsp) white sugar
  • 100 ml (1/2 cup) water
  • corn starch
Directions
  1. Wash the strawberries and slice off the leaves.
  2. Divide the anko in half then separate each half into three. Altogether, there should be six even portions. Roll each portion into a ball.
  3. Flatten the ball into a circle and place the strawberry with its tip touching the anko. Gently, mould the anko upwards to completely cover the strawberry. Set the balls aside and cover with plastic wrap over to preserve moisture.
  4. Set the steamer on middle-heat setting.  Wrap a clean kitchen towel around the cover as this will prevent water dripping on to the balls.
  5. Add glutinous rice flour and sugar into a NON-STICK bowl. With a spatula, stir while gradually adding water. Make sure there are no clumps of rice flour left before steaming the mochi mixture.
  6. Place the bowl and dough inside the steamer. Turn the heat up to high and let it steam for 15 minutes.
  7. Meanwhile, dust the baking sheet with corn starch and leave the corn starch close by for later.
  8. Carefully, remove the hot bowl from the steamer with a towel. Wet the spatula with water to help scrape down the sides and also the bottom of the bowl for the mochi to shape into a ball.
  9. Drop the mochi on to the baking sheet then sprinkle some corn starch on top. Coat your hands with corn starch before handling the sticky mochi.
  10. Like the anko, twist to separate the
    mochi into six even pieces then roll each piece into a ball. Tip: Dab corn starch on the sticky ends to prevent sticking together after each twist.
  11. Flatten the mochi ball and dust off corn starch on one side with a brush. Place the anko-covered strawberry on the dusted side then the mould the mochi upwards around the anko. Twist off the mochi at the top to secure it.
  12. Refrigerate until serving time.
  13. Dust off excess corn starch on the ichigo daifuku with a brush before serving

Bow-tie Calico approves with a tongue lick!


Bánh mì


Here's something that has become really popular lately. So of course, we had to try making it.


Banh mi with ham

Bánh mì (banh mi), if you're not familiar with it, is a Vietnamese sandwich, similar to a sub, but with Vietnamese ingredients. Here's a good intro on Wikipedia.


Banh mi with tofu

These are often available in your local china town, and are usually very cheap. Either buy one for two dollars or buy ten and get one free! Our version is larger than the typical purchased version, so it will cost more.

There are many ways to make it. Here's our favourite:


Ingredients
  • A bun. We use a hoagie-style bun, which is smaller than the typical submarine sandwich bun. Fresh is best, of course. Some people remove the bread from the inside of the roll, leaving only the crust
  • A spread for the inside of the bun. Pâté (or pate) is traditional, although mayo or butter are good alternatives. Have mayo and pate at the same time to be decadent.
  • There's a variety of meat. Vietnamese pepper ham (see photo) is a traditional choice , although we've used Tuscan ham, which also contains pepper, from the deli in the grocery store. Other good choices are:
    • Eggs, fried or scrambled
    • Barbecue chicken
    • Sardines
    • Marinated tofu (See below)
  • Carrot
  • Lo bok (aka white carrot). This is similar to a daikon radish.
  • 15 ml (1 tbsp) sugar
  • 250 ml (1 cup) rice or white vinegar
  • English cucumber, sliced into thick matchsticks
  • Green onions, sliced into matchsticks
  • Coriander (aka cilantro), leaves and stems
  • A Thai bird chili or two, optional. One for the carrot and lo bok pickles and another one for sandwich topping.
  • Ground black pepper for seasoning

Preparation

For pickled carrots and lo bok:
  1. Slice carrot and lo bok into thick matchsticks
  2. Finely chop a thai bird chil
  3. Mix the sugar and vinegar
  4. Add the carrot, lo bok, and chili to the liquid mixture and refrigerate overnight.

For tofu filling:
  • 500 g (1 lb) extra firm tofu
  • ground black pepper
  • 2 ml (1/2 tsp) cayenne
  • 5 ml (1 tsp) dry mustard
  • 5 ml (1 tsp) grated or ground ginger
  • 60 ml (1/4 cup) soy sauce
  • 30 ml (2 tbsp) minced chives
  1. Slice the tofu into 8 slabs.
  2. Mix the rest of the ingredients and put into a large, low dish
  3. Add the tofu and marinate, turning often for 2 hours
  4. Fry the tofu to brown it

    Instructions

    To assemble the sandwich. Put out the ingredients on the table and everyone makes their own.
    1. Slice open the roll and toast it
    2. Spread the roll with the pate or mayo or butter
    3. Add the meat or tofu and veggies to your liking. Don't forget to cut up another chili and add it here.

    And enjoy. Bow-Tie Calico approves of the toasted bun. And more.


    Bacon and Egg Breakfast Muffins


    This is another favourite of ours.  It takes a little bit of time to prepare, but is oh-so-dee-lish.  We generally try to stick to having it for special occasions only, as there are quite a few calories in one of these.

    Some of us may be familiar with this type of breakfast treat, from one or more of the American fast-food chains. Is this version better?  You decide.

    This is not really the type of dish that needs a recipe, but it's amazing how many people have not thought of making it.  So, in the best tradition of stating the obvious, here we go.


    Ingredients for each muffin
    • an English muffin
    • an egg
    • a slice or two of bacon.  Back bacon (aka Canadian bacon) is good too, and a slice of ham is another option.  Or skip the meat altogether if that's your thing.
    • A slice of cheese.  Swiss is good, but any other "meltable" cheese is fine, too.


    Directions
    1. Cook the bacon. It should be put into a cold pan and cooked slowly until perfection.   For best results, it should be chewy and not very crisp.  Remove the bacon from the pan and place on a paper towel to drain.  Wipe out the pan and return it to the stove for the next step.
    2. Fry the eggs.  This can be done with a hotter pan than the bacon.  Partway through cooking, flip them over to help cook the yolk until it's just hard.  A minute or so before the eggs are done, top it with the slice of cheese so it melts just a bit.
    3. Optional: put some herbs and spices on the egg when it's first put into the pan.  We like freshly ground black pepper and dried basil.  But other flavours are good, too.  A little bit of cumin goes especially good with eggs.
    4. While the eggs are cooking, toast the muffins.
    5. Assemble the muffin.  Stack the egg and cheese on the muffin and top with bacon.


    Enjoy.  You'll see why we think that this is a treat and loaded with calories because, really, who can eat just one?  We challenge you to try.

    Even Bow-Tie Calico approves!


    Rhubarb-Strawberry Pie


    Here's an old family favourite for me: rhubarb and strawberry pie! Yet another dessert that is so bad for you but oh-so-good for your nose and tastebuds. For Wonder Woman and Da Original Gangstur, though, it's a new family favourite. That's because it's the first time either of them has tasted rhubarb.

    Fresh rhubarb is fairly seasonal as it is a spring crop. Rhubarb is also available in the frozen vegetable section of most grocery stores so don't get discouraged if fresh is not around. Frozen is pretty much as good as fresh when in a pie as it's smothered in sugar and pastry. For us, I bought too much and put the rest into the freezer for later.

    Rhubarb is an unusual vegetable. It's the stem of a leaf but don't eat the leaf as it's not good for you. It looks a little like celery but tastes so much different. The plants are generally grown in the dark to make the plant grow taller quicker to help the leaves find sunlight. The colour varies from red to green and all shades in between, but there's no difference in taste.

    Because rhubarb is so sour and tart, this recipe uses lots of sugar to balance the taste to perfection. It makes just the right amount of tang in your mouth. After tasting the pie, Da Original Gangstur asked "Is this apple pie?" That's probably because of the added cinnamon.


    The Pastry

    This will make two crusts for a 25 cm (9 inch) pie plate, either for a single two-crust pie, or two single-crust pies. In our case, this is a two-crust pie so this makes enough for one pie.


    • 180g (1 and 1/2 cups) flour. We use whole-wheat flour, though all-purpose white works too.
    • 2 ml (1/2 tsp) salt
    • 10 ml (2 tsp) baking powder
    • 125 ml (1/2 cup) unsalted butter, chilled
    • 125 ml (1/2 cup) vegetable shortening, chilled
    • ice water, up to 60 ml (1/4 cup)


    1. Mix the flour, salt and baking powder together in a bowl.
    2. Add the butter and shortening. Use a pastry cutter to "cut" the butter and shortening into the dry mixture. The idea is to cut up the butter and shortening into small bits that are then coated with flour. If you don't have a pastry cutter, then use two table knives in a scissor motion. It'll take longer with the knives but the result will be just as good.
    3. Once the mixture resembles coarse meal, then add the ice water, 15 ml (1 tbsp) at a time until the mixture holds together when you form it into a ball.
    4. Wrap the ball of pastry in wax paper and put into the fridge for two hours or overnight.
    5. Split the ball into two and put one of the halves back into the fridge. Roll it out on a floured surface into a circle with your favourite rolling pin. You may want to roll it on top of a sheet of wax paper to make it easier to move into the pie plate.
    6. Once it's rolled out to the right size, transfer it to a greased pie plate. Another tip for moving the crust is to roll it around the rolling pin, including the wax paper, and unroll it on the pie plate.
    7. Shape around the edges to make it look nice.
    8. After the pie is filled (see below), roll out the other crust and put on top. Fold the edges back on itself to form a nice ridge all around.
    9. Use a fork or a similar item to press around the edges in a nice pattern. Use a sharp knife to slash the top crust to let steam escape.


    Pastry tips:

    • Notice that everything should be cold -- the butter, shortening and water. This is to prevent the flour from dissolving into the butter and shortening. This way, it's a much lighter and flakier crust.
    • Handle the dough as little as possible. This also is to prevent mixing and make it light and flaky.
    • Use a marble slab for rolling if you can. That also keeps everything cool.
    • If you are using a recipe that calls for a baked crust, then bake for 15 to 20 minutes at 190C (350F). Before baking, poke some holes in the pastry with a fork to keep it from puffing up too much.


    The Filling

    • 1 l (4 cups) of rhubarb. It should be washed and sliced into 2 cm (1 inch) lengths. In our case, we use 750 ml of rhubarb and 250 ml of strawberries
    • 190 ml (3/4 cup) sugar
    • 60 ml (1/4 cup) flour
    • 5 ml (1 tsp) ground cinnamon


    1. Preheat the oven to 190C (350F)
    2. Place the rhubarb, and strawberries if you're using them, in a bowl. Mix the flour, sugar and cinnamon and pour over the rhubarb. Toss gently to coat everything.
    3. Pour the filling mixture into the pie plate on top of the bottom crust. Put the top crust onto the filling and shape (see above).
    4. Bake for 60 minutes. Put a cookie sheet under the pie to keep your oven clean. This will get juicy!
    5. Remove from the oven and place onto a rack to cool. Just after removing, sprinkle the top with sugar for a nice sparkly look.


    When you can wait no longer, slice and serve. Ice cream or whipped cream are great accompaniments and it's also good by itself.

    Tip: after washing and slicing the rhubarb, pop any extra into a freezer bag and freeze for later.


    Does Bow-Tie Calico approve? She does!