Cats, Cooking, and Life!

Fried Clams and Poutine râpée

I recently posted about the lobster and steamed clams and pie from our recent vacation while visiting the Admiral Catnap (retired) and the Admiral Catnap (retired), i.e., my parents. I also want to show other dishes we eat while there. The food is unique to the area and worthwhile seeking out.

Fried Clams

Fried Clams

This is one of the few deep-fried dishes I never fail to get. But since it's usually only once per year, my conscience is clean.

Fried clams are a speciality of the area. I know of half a dozen restaurants which serve them, including a fast-food chain. There are some in south-eastern New Brunswick and in Maine. They are nowhere else in the world, as far as I know. Please let me know in the comments below if you know of any outside this area. I'd love to visit others.


Fred's


The best of all the restaurants my family and I tried is Fred's Restaurant in Cap Pele. It is consistently tops in my own experience, and in the one or two reviews I heard about. The original Fred sold the business many years ago and I don't know if the recipe was his invention or was perfected by one of his successors.

How do they prepare the fried clams?


Fried Clams

They start with fresh clams. They are usually not local to the restaurant's area but are within a couple of hundred kilometres. Nova Scotia is a popular source. The clams are made ready for eating, meaning cleaned of any sand or grit, and shucked. I very rarely get a shell fragment in the clams and never any sand.

They then coat the clams in pancake batter, which may or may not be an insider secret. That's right, their excellent batter is nothing more than commercial pancake mix. Coating the clams is a messy process and involves mixing the clams into the batter using their hands.

From the batter, the clams go into the deep fryer, where they're cooked to perfection every time. The servers wouldn't tell us any secrets to this, similar to how double-frying is best for french fries.

Then from the deep-fryer to the table, a short a trip as possible. When eating deep-fried it's always best to be hot and fresh from the fryer.


Homemade Onion Rings

We get the homemade onion rings for a side. They are just what you expect, rings of onion with batter and deep fried. Mmmmmm, a deep-fried dish to accompany a deep-fried dish. The batter for the rings is different and probably contains some bread crumbs.

We are always a group of four or more and we all love clams, so we end up getting 3 or more platters of clams plus a side of rings. The technique we've hit on is to ask them to bring out the platters one at a time, 10 minutes apart. This way, we share each platter and it ensures a supply of fresh, hot clams for everyone.


Poutine râpée

This dish is more subtle than the fried clams.

Forget everything you know about the Canadian fast food speciality of poutine, the french fries and cheese curds and gravy that's popular in most of the larger cities. The chip wagons serve nice poutine but that's not what I'm talking about.


Poutine râpée


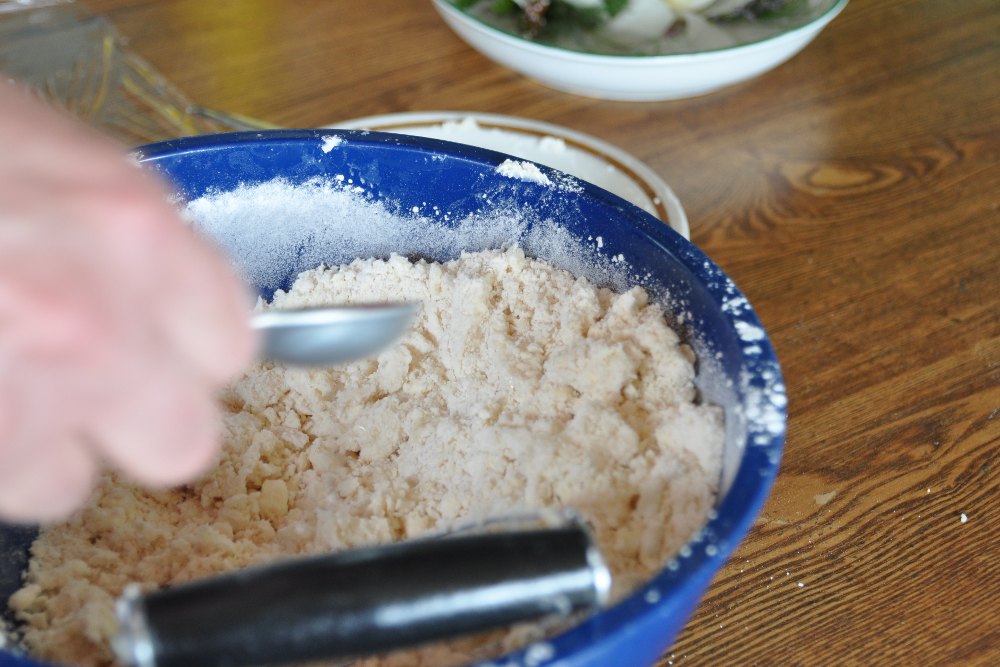
Poutine râpée, despite the similar name, is quite different than poutine. It's an Acadian dish and goes something like this.

They start with cooked pork. Sometimes salted, but the ones we get are not salted pork.  The pork is wrapped in a mixture of potatoes. Part mashed potatoes and part raw grated potatoes. They are about 10 cm in diameter. The balls are boiled for a long time, perhaps an hour or more.

The balls are then served with a little of the cooking water, which now resembles a thin potato gravy. We put them in bowls, and top with fresh-ground black pepper and occasionally hot sauce.

They are a little bland but good. They're a delicious treat worth every bite. The pork looks a bit pink but it is cooked and safe to eat.

We get ours from a small store near Grand-Digue, and it's in the middle of nowhere. We take our own plastic container as we buy enough for everyone.


Next time you're in south-east New Brunswick be sure to seek out these regional dishes. You'll thank yourself.

Rhubarb-Strawberry Pie, Revisited


We enjoyed making and eating the original rhubarb and strawberry pie.  However, there's always room for improvement. Since we were visiting my parents, my mum, the Admiral Catnap (retired), was kind enough to give us a lesson on pie crust making.  Her tips included a new and better recipe for the pie crust even though the original recipe came from her.


Fab strawberries


We didn't set out specifically to remake rhubarb and strawberry, but the local produce stand had some delish local strawberries along with some fresh rhubarb so our choice was made for us.


The Crust

This makes enough for two crusts in a 25 cm (9 in) pie plate.  Changed from before are the amount and type of flour and the amount of the baking powder.
  • 125 ml (1/2 cup) unsalted butter
  • 125 ml (1/2 cup) vegetable shortening
  • 250 g (2 cups) flour. (formerly 180 g of flour.  We used all-purpose white flour this time.)
  • 2 ml (1/2 tsp) salt
  • 5 ml (1 tsp) baking powder (formerly 10 ml)
  • ice water, up to 60 ml (1/4 cup)


Here's how we did it.

  1. Slice the shortening and butter into small pieces.  Put them on a plate and pop it into the freezer for a couple of hours.


    Add butter and shortening to the flour
  2. Mix the flour, salt and baking powder together in a bowl.
  3. Add the butter and shortening. Use a pastry cutter to "cut" the butter and shortening into the dry mixture. The idea is to cut up the butter and shortening into small bits that are then coated with flour. If you don't have a pastry cutter, then use two table knives in a scissor motion. It'll take longer but the result will be just as good.


    Add ice water

  4. Once the mixture resembles coarse meal, then add ice water, 15 ml at a time until the mixture barely holds together when you form it into two balls, one for each crust.  It's important to handle the pastry as little as possible at this point.  The Admiral says that even flattening the ball now is handling it too much.  It's better to start shaping the ball after the next step.
  5. Wrap the pastry in plastic wrap and put into the fridge for two hours or overnight.
  6. Take a ball of pastry and flatten it. Roll it out on a floured surface into a circle with your favourite rolling pin. Use flour to prevent it from sticking, or, sprinkle more water on the dough if it's too dry to hold together.
    Form into balls
  7. When rolling the dough, turn it occasionally to keep it from sticking to the surface.  This makes it easier to lift later.  And it also helps keep it round.
  8. When it's the right size, transfer to a pie plate. Another tip for moving the crust is to roll it around the rolling pin, including the wax paper, and unroll it on the pie plate.
  9. Don't worry about shaping the crust at this point, and don't worry about filling in any small holes that may have formed.  No one will see the bottom crust.  Use a table knife to cut off any excess pastry and save it for decorating the pie after the top crust is in place.
    The dough is ready for the fridge


  10. Add your favourite filling.  We had already chopped and combined the ingredients into a plastic bag so all we had to do was dump the contents into the pie plate.
  11. Roll out the other crust and put on top. Fold the edges back on itself to form a nice ridge all around.
  12. Use a fork or a similar item to press around the edges in a nice pattern. Use a sharp knife to slash the top crust to let steam escape.


Pastry tips:
  • Notice that everything should be cold -- the butter, shortening and water. This is to prevent the flour from dissolving into the butter and shortening. This way, it's a much lighter and flakier crust.
  • Handle the dough as little as possible. This also is to prevent the flour from dissolving into the butter and make it light and flaky.
  • Use a marble slab for rolling if you can. That also keeps everything cool.
  • The Admiral says that although you should only add as little as possible ice water to the dough, she's never seen any harm from too much water.
  • If you are using a recipe that calls for a baked crust, then bake for 15 to 20 minutes at 190 C (350 F). Before baking, poke some holes in the pastry with a fork to keep it from puffing up too much.


The Filling

The only change from before is the addition of the pat of butter.
  • 1 l (4 cups) of rhubarb and/or strawberries. It should be washed and sliced into 2 cm (1 inch) lengths. In our case for the revisited pie, we used 250 ml of rhubarb and 750 ml of strawberries
  • 190 ml (3/4 cup) sugar
  • 60 ml (1/4 cup) flour
  • 5 ml (1 tsp) ground cinnamon
  • A large pat of butter, about 60 ml


Here's how to put it together.
Ready to transfer the top crust
  1. Preheat the oven to 190 C (350 F)
  2. Place the rhubarb, and strawberries if you're using them, in a bowl. Mix the flour, sugar and cinnamon and pour over the rhubarb. Toss gently to coat everything
  3. Pour the filling mixture into the pie plate on top of the bottom crust
  4. Place a large pat of butter on top of the filling, in the centre
  5. Put the top crust onto the filling and shape (see above)
  6. Bake for 45 minutes. Put a cookie sheet under the pie to keep your oven clean. This will get juicy!
  7. Remove from the oven and place onto a rack to cool. Just after removing, sprinkle the top with sugar to make it sparkle 
  8. You can freeze the unbaked pie.  If you do, increase the baking time to 60 minutes.

Before baking


Once it's cooled enough, slice and serve!  Optionally, serve with whipped cream or ice cream.

Just right

Sharp-eyed readers will notice that this isn't Bow-Tie Calico, as Bow-Tie didn't come with us on vacation.  However, her uncle, Able Seaman Catnap, consented to approve the pie instead!


Yum!

Boiled Lobster

Beer and lobster.  Mmmmm

On vacation, once again, at the lobster capital of the world, so what else could we do?  Boil some lobster, of course.

Fresh out of water and very aggressive
Yes, we've all heard the arguments about cruelty to animals, but I don't know of any better way to kill them, so as far as I'm concerned, this is the most humane way.

Our usual supplier got us 10 lobster for six people.  They were all about 700g, so were ideal.  They all had lots of meat and were not too tough.  These came from very cold water, so their shells were thick and very hard.

We had a mix of 5 females and 5 males, which was a good split, considering our audience.  We all have our preferences as to which is better and seem to debate it every time we gather for our feast.

Our menu pretty much always consists of::
Admiral Catnap's propane burner and pot
  • Lobster
  • Butter for dipping
  • Potato salad
  • Crusty rolls.  These are great for putting the green liver on, for easier eating
  • Wine and beer.  Responsibly used, of course.

Here's how we cooked the lobster.

Take a humongous pot, and fill it with sea water.  Add a generous handful of salt.  Yes, this seems like overkill, but the extra salt brings out the flavour.

Put the pot on a large burner, cover it and bring to a boil.

In the meantime, prepare the lobster.  In our case, this meant removing the rubber bands from around the claws.  If you don't, then the rubber will "flavour" the cooking water and that's never a good thing.

When the water boils, add the lobster (and listen for the "screams").  Bring the water back to a boil.

Just after adding the lobster

Reduce the heat and boil for 20 minutes.  Enjoy the colour change as the shells go from dark green to bright red.

After the 20 minutes are up, remove them from the water and bring them to the table.

Nearly cooked

Enjoy!  Make sure everyone has access to picks, crushers and maybe knives to get at all the delicious meat.

Removing the lobster

In our family, everyone has their favourite part of the lobster.
  • Some of the easiest meat to get at is the legs.  Break the legs at the joints and suck out the meat from the shells.
  • Just where the legs attach to the bodies is some of the tenderest and sweetest meat on the lobster.  The main body has some morsels, but only eat what you can shake out of it.  Don't eat the head.
  • The claws and arms have great morsels, but require the most work.
  • The tail has the largest piece of meat and is not too difficult to remove, but is often the toughest meat.  Just be sure to remove the "vein" from inside as this is not pleasant to eat.
  • Females sometimes contain some eggs, or roe.  This is a bright red mass that's solid once cooked.  These are an extra special treat for those of us who like it.

Stacking on the platter

Quite often we barter pieces of lobster with each other.  Commodore Catnap and I often trade a tail for two claws. So everyone gets more of their favourite.  Sometimes it's difficult to say how many lobsters we eat.  But generally speaking, we have one or two per person.

Steamed Softshell Clams

A plate of the finest

One dish that's always on our list of "must eats" at the cottage is steamed clams.  Or maybe steamed mussels.  But this time, it's clams.

The local clam is the softshell clam.   This batch was larger than we're used to, but they were still tasty and not a bit tough or chewy.  They had more sand and grit that we wanted.  If you get clams that are freshly dug, here's a tip: put the clams in a bucket of fresh seawater and let them sit for a day.  They "spit" their sand as part of their natural filtering process and your meal will be more enjoyable.

Be sure to examine the clams before they're cooked and discard any that the shells aren't tightly closed.  Those could be dead or less than fresh, which don't make for good eating.  Likewise, don't eat any that haven't opened their shells after cooking.  Those probably aren't worth eating either.


Method 1

This is our preferred method these days, where we steam the clams in a large pot.  For this, we need:
The pot and propane burner
  • a good supply of clams
  • a little bit of fresh water
  • a large pot on a good burner
  • a slotted ladle
  • serving trays
  • some melted butter for dipping.  Ideally, everyone should have their own dish
  • optional: finely chopped garlic for the butter.  Some like it, some don't
  • fresh-ground pepper
  • coffee mugs

Simply dump the water in the bottom of the pot.  In our case, it was about a litre of water which barely covered the bottom of the monster pot.  Then we put in the clams and put the pot on the burner and turned it to high.

At the start of cooking

The water will boil and turn into steam which starts to cook the clams. Then, the clams will open enough to release their own liquid, which falls to the bottom of the pot.  This cools the pot slightly and it goes off the boil. But it eventually boils again, and continues cooking.

This is the type of dish I can't put a firm time to cook, as it depends on the size of the pot, the temperature of the burner and the amount of clams you are cooking, but watch them carefully and look for them to open.  That's when you'll know they're done.

Some have opened, others not yet

Scoop them out with a ladle, bring them to the table and make sure everyone has a good supply of melted butter for dipping.  Be sure to remove the outer casing from around the neck.  Otherwise the entire clam is edible.  Watch them disappear.

On the picnic table

A nice accompaniment for the clams is the liquid at the bottom of the pot.  Scoop it into coffee mugs, put a few drops of melted butter and a couple of grinds of black pepper for a delicious drink! We call it dross, though I'm not sure why.  Any dictionary I've seen makes dross sound less tasty than it is.  Salt content is high, though.

A mug of dross

Method 2

We used to do it this way back, quite a few years ago, when the beach still had some sand on it.

We would build a large bonfire in a sand pit using mostly driftwood.  After the fire had burned down to mostly embers, we'd place a large metal mesh on top.  Then, the clams go on top of the mesh and a thick layer of seaweed covers all.  It would take 20 to 30 minutes for the clams to finish cooking this way.

When the clams opened from the heat, they'd drop their liquid onto the embers which created enough steam to cook them.

Then we'd gather them from the mesh and eat.  They'd taste great, although the clams were drier than the first method.

Tiramisu

Time for another dessert that's bad for you, but oh-so-great on the taste buds!  We in the Calico Kitchen, yes even including Bow-Tie Calico, think that it's OK to have these waist-increasing treats, as long as they are taken in moderation along with healthy food and enough exercise.

Tiramisu is Italian for "pick me up", which is exactly how you'll feel after trying this sumptuous dessert.  The combination of biscuits, coffee, cheese, chocolate and eggs that somehow come together in a taste explosion in your mouth is a distinctive experience.  You'll need to try it to see what I mean.

Da Original Gangstur has been wanting to make this for a while, so we finally decided to give it a try.  It wasn't too hard to find a simple recipe.

There's a nearby Italian deli so we were able to find good biscuits and mascarpone.  The mascarpone is expensive but improves the dish.


Ingredients
  • 125 ml strong coffee (1/2 cup)
  • 60 ml Kahlua liqueur (1/4 cup).  Rum is a good alternative
  • 4 eggs, separated
  • 60ml sugar(1/4 cup)
  • 250g mascarpone cheese, room temperature (2 x 8oz. packages)  If you can't find mascarpone, and I mean after really trying, then cream cheese will be acceptable.
  • 250g package of lady fingers (8 oz)
  • About 30 g of cocoa powder for sprinkling on top.  (1 oz)  Alternatively, you can finely grate some chocolate.
Beat the egg yolks

Directions
The egg yolks, sugar and cheese
  1. Combine the coffee and Kahlua, and set aside to cool.
  2. Beat egg yolks. Add sugar gradually until well mixed. Add cream cheese and mix well. 
  3. In another bowl, whip egg whites until soft peaks form. Fold into the cheese mixture.  Be careful to mix these as little as possible, otherwise the egg white foam will collapse.
  4. Spread a layer of cheese mixture into a glass serving bowl. Dip lady fingers into the coffee mixture and cover cheese layer.
  5. Repeat the layers until the pan is full
  6. Sprinke chocolate on top
  7. Refrigerate 6 hours or overnight.
Whip the egg whites

Layer the biscuits and egg and cheese mixture


Sprinkle with cocoa


And, of course, Bow-Tie Calico approves.