Cats, Cooking, and Life!
Showing posts with label egg. Show all posts

Japanese Crab Cakes with Spicy Mayo


This is a great recipe that makes for some scrumptious crab cakes. They're a bit finicky, though, as several steps are required to put them together. But they're not difficult to create.

More importantly, they need to be deep fried, so this recipe is *not* for everyone!

But we're not everyone so we bravely forged ahead. The Wonder Woman has lots of experience with stovetop deep frying as she has make wonderful spring rolls for lots of years (more about them in a later post).

Our deep fryer is a pot on the stove top. It's fine if you watch carefully and don't allow it to overheat and start smoking or burning. We keep the heat relatively low, too.

These crab cakes are very nice when served fresh from the fryer with some spicy mayo. The spice level is up to you, of course. Feel free to adjust the ingredients as you see fit.


Ingredients for the spicy mayo
  • 120 ml mayonnaise (1/2 cup)
  • 60 ml (or to taste) your favourite hot sauce such as Sriracha or Sambal Oelek or Tabasco (1/4 cup)
  • 30 ml tobiko fish roe (optional) (2 Tbsp)
  • 10 ml rice wine or rice vinegar (2 tsp)
  • freshly grated lemon zest

Ingredients for the crab cakes


  • 65 g flour (1/2 cup)
  • 120 g butter (1/2 cup)
  • 750 ml milk (3 cups)
  • 500 g crab meat, in small chunks or diced. (1 lb)
  • 1 small onion, finely minced
  • salt and pepper to taste
  • 125 ml rice wine (optional) (1/2 cup)
  • 1 medium potato, cubed and boiled. mash it until it's no longer lumpy
  • Flour for coating
  • 1 egg, beaten, for coating
  • Panko bread crumbs, from Japan, for coating. You can substitute regular bread crumbs but they won't have that special crunch.
  • oil for deep frying

Directions for the spicy mayo

Combine all ingredients in a small blender, or stir vigorously. Refrigerate until ready to use.


Directions for the crab cakes


Start by melting the butter in a small saucepan. Mix in the flour and stir until well combined. Then gradually add the milk and stir until it's smooth.


Add mashed potato in the milk mixture. Mix well.

In a fry pan, carmelise the onion.  Add the crab meat onion and stir fry for a bit.  Add salt, pepper and wine to season.

Add the crab mixture to the potato and milk.  Remove from heat and set aside to cool enough to handle easily.


Lay out 3 medium-size bowls, one containing flour, one with the beaten egg and the last containing bread crumbs. Line a tray with wax paper to hold the finished crab cakes.


With your hands, take some crab mixture and shape into a ball, about 3 cm in diameter.


Dredge the ball in the flour. Remove it and shake off any excess flour. Then dip it in the egg until coated. Remove and shake off the excess egg. Finally, roll the crab in the bread crumbs. Flatten into a disc and place on the tray. Repeat for the rest of the crab cakes.


Heat the oil in the deep fryer or pan. The oil should be at least 5 cm deep to be effective. Otherwise the oil will cool too much when the cakes are added.


Have a plate lined with paper towels ready to drain the crab cakes as they're finished frying.


Once the oil is medium hot, add a crab cake, two at a time into the pan. They'll float to the surface. Watch them carefully and turn once when browned. Remove from the oil and onto the cooling plate. Repeat for all.  The purpose of the frying is to brown the breadcrumbs.  The crab mixture is already cooked so you don't need to deep fry for long, and not a very high temperature.

Serve while still hot along with the dipping sauce in small bowls.

Makes about 20 crab cakes.

Pumpkin Chiffon Pie

Pumpkin Chiffon Pie

Another month, another pie. And another seasonal one as well. Pumpkin, that fall classic, is as much as home at Thanksgiving as it is at Halloween. Or, for that matter, at any other time when pumpkin is available. No need to wait for a special occasion. We didn't.

Pie pumpkins, as they're called, show up everywhere these days, at least here in North America, and are very easy to turn into the smooth-textured, orange and tasty ingredient that makes you feel so much more confident in your pie than the canned version. According to most sources I've heard from, you can't even count on the canned pumpkin containing real pumpkin. That's not to say that they're no good for pies; of course they are. But saying "pumpkin pie" sounds so much better that "squash pie."

You could use the jack-o-lantern pumpkins for pie, but they're not as sweet, and are stringier in texture. So make it easy on yourself and get a pie pumpkin.

A little bit of a twist on traditional pumpkin pie, we opted for chiffon. That's a fancy way of saying it's fluffy from incorporating beaten egg whites. Sort of like an angel cake is fluffy.

What follows is a multi-stage preparation to produce the pie. None of it is difficult, but it does take a bit of time. Luckily, you can do everything ahead of serving time, and when it's time to serve, you simply take it out of the refrigerator, top with whipped cream and serve! That makes it the ideal finale for any meal where you want to impress.


Part 1: Prepare the Pumpkin

Using the pie recipe below, we found that one average pie pumpkin, 25 to 30 cm, is enough for about 3 pies. So you may want to make more pies and freeze them, or simply freeze the extra pumpkin for later use. Pumpkin is also good for spice bread, muffins and lots of other treats. Here's how to prepare it. You'll need a steamer, or a large bowl for the microwave.


Cut open

  1. Wash and gently scrub the pumpkin in cold or warm water. Don't use soap.
  2. Using a sharp knife, cut the pumpkin in half. 
  3. Remove the stringy insides with a spoon. Save the seeds, if desired, to roast them as described below. 
  4. Remove the stem and cut the remaining pumpkin into pieces to fit into your steamer or bowl. 
  5. Cooking with a Steamer method: Boil enough water and cook the pumpkin for 20 minutes. 
  6. Cooking with a Microwave method: Put water in the bottom of the bowl, add the pumpkin and microwave it for about 20 minutes. You'll need to periodically stir or re-arrange the pieces for even cooking. Watch the water doesn't boil over. 
  7. The pumpkin is cooked when it is soft for a fork. 
  8. Remove the outer skin using a sharp knife. 
  9. Place the remaining pumpkin in a food processor or bowl. Puree or mash it. At this point you may make your pie, or freeze the unused portion in an airtight container.


Scooping the inside


In the steamer


Removing the skin


Puree in a mixer


Part 2: Pumpkin Seeds

If you like pumpkin seeds, you can roast them. We think they taste good but are too small and much work so don't always make them. One pumpkin does not provide many seeds but they're tasty.

  1. Remove the seeds from the stringy parts of the pumpkin 
  2. Wash the seeds. The best way I found is to put them in a bowl of water and rub them with your hands. The seeds float and the pumpkin "strings" sink. 
  3. Place the seeds on a cookie sheet or other oven pan. 
  4. Optionally season the seeds with melted butter combined with garlic, lemon, green herbs like dried basil or just about anything else you like. 
  5. Place the pan in a low oven 150 C (275 F) for about 20 minutes more or less, depending on how wet the seeds were. You should stir them every 5 minutes to make sure they are evenly cooked. Be sure to watch them closely as they can burn easily. They are done when they are dried and slightly brown. 
  6. Cool 
  7. Enjoy. Crack the shell and eat the insides.

Ready to bako

Ready to eat


Part 3: Pumpkin Chiffon Pie 

 Here are the ingredients for one pie. You'll need a baked pie shell, about 25 cm (9 in). Please look at our pastry recipe for Rhubarb-Strawberry pie, or make your own, or purchase one. But you'll only need a single crust.

For this recipe, you'll need a double boiler. Or do as we did and use two pots, one to fit inside the other.

 Ingredients:

  • 1 envelope unflavoured gelatin (7 g or 1 Tbsp) 
  • 125 ml cold water (1/2 cup) 
  • 4 eggs, separated 250 ml evaporated milk (1 cup) 
  • 250 ml pumpkin, either prepared as above or canned (1 cup)
  • 180 ml brown sugar (or white sugar if you prefer) (3/4 cup) 
  • 2 ml salt (1/2 tsp) 2 ml nutmeg (1/2 tsp) 
  • 2 ml ground cinnamon (1/2 tsp) 
  • 1 ml ground ginger (1/4 tsp) 
  • 250 ml whipping cream, whipped (1 cup)


 Instructions:

  1. Dissolve gelatin in cold water. Set aside to soften. 
  2. In double boiler heat the egg yolks, milk, pumpkin, 1/2 cup brown sugar and spices. Cook, stirring for 10 minutes. 
  3. Remove the mixture from heat, add gelatin, stirring until dissolved. Refrigerate until it's thick. It needs to be thick to combine with the egg whites in the next step. Otherwise the egg whites will float to the top. 
  4. Beat egg whites until stiff. Fold into pumpkin mixture. 
  5. Pour into the pie shell and refrigerate until ready to serve. 
  6. Whip the cream and give everyone a spoonful on their slice (the size of the spoon is open to interpretation).


Whipping the egg whites


Our makeshift double boiler


Baked crust


And enjoy!

After refrigeration


We know Bow-Tie Calico did!


Approve!


Tiramisu

Time for another dessert that's bad for you, but oh-so-great on the taste buds!  We in the Calico Kitchen, yes even including Bow-Tie Calico, think that it's OK to have these waist-increasing treats, as long as they are taken in moderation along with healthy food and enough exercise.

Tiramisu is Italian for "pick me up", which is exactly how you'll feel after trying this sumptuous dessert.  The combination of biscuits, coffee, cheese, chocolate and eggs that somehow come together in a taste explosion in your mouth is a distinctive experience.  You'll need to try it to see what I mean.

Da Original Gangstur has been wanting to make this for a while, so we finally decided to give it a try.  It wasn't too hard to find a simple recipe.

There's a nearby Italian deli so we were able to find good biscuits and mascarpone.  The mascarpone is expensive but improves the dish.


Ingredients
  • 125 ml strong coffee (1/2 cup)
  • 60 ml Kahlua liqueur (1/4 cup).  Rum is a good alternative
  • 4 eggs, separated
  • 60ml sugar(1/4 cup)
  • 250g mascarpone cheese, room temperature (2 x 8oz. packages)  If you can't find mascarpone, and I mean after really trying, then cream cheese will be acceptable.
  • 250g package of lady fingers (8 oz)
  • About 30 g of cocoa powder for sprinkling on top.  (1 oz)  Alternatively, you can finely grate some chocolate.
Beat the egg yolks

Directions
The egg yolks, sugar and cheese
  1. Combine the coffee and Kahlua, and set aside to cool.
  2. Beat egg yolks. Add sugar gradually until well mixed. Add cream cheese and mix well. 
  3. In another bowl, whip egg whites until soft peaks form. Fold into the cheese mixture.  Be careful to mix these as little as possible, otherwise the egg white foam will collapse.
  4. Spread a layer of cheese mixture into a glass serving bowl. Dip lady fingers into the coffee mixture and cover cheese layer.
  5. Repeat the layers until the pan is full
  6. Sprinke chocolate on top
  7. Refrigerate 6 hours or overnight.
Whip the egg whites

Layer the biscuits and egg and cheese mixture


Sprinkle with cocoa


And, of course, Bow-Tie Calico approves.
 

Oven-Baked Fish & Chips


Here's something I've been making, like, forever and have introduced to the Wonder Woman and Da Original Gangstur.  They love it!

Being baked with a minimum of oil, it's a relatively healthy dish, at least from the point of view of being low-fat.  It's still relatively high in carbs, though, so take your pick as to which discipline you want to follow.

This recipe feeds 3 or 4 people, depending on how hungry you are.

Ingredients:
French fries
Fries, seasoned and ready to bake
  • 2 large potatoes, about 1 kg.  Use Russetts, or other "baking" style potatoes.  These make the best fries.
  • 15ml oil (1 tbsp)
  • Salt and pepper and / or other seasoning as you prefer.  We all like a "garlic with herbs" shaker that Wonder Woman picked up somewhere but can't remember where.

Fish
  • 400g fish.  Traditionally, cod is preferred, although salmon is an excellent choice.  But any firm-fleshed fresh fish will be fine.
  • 60g flour
  • 5 ml dry mustard
  • 1 egg
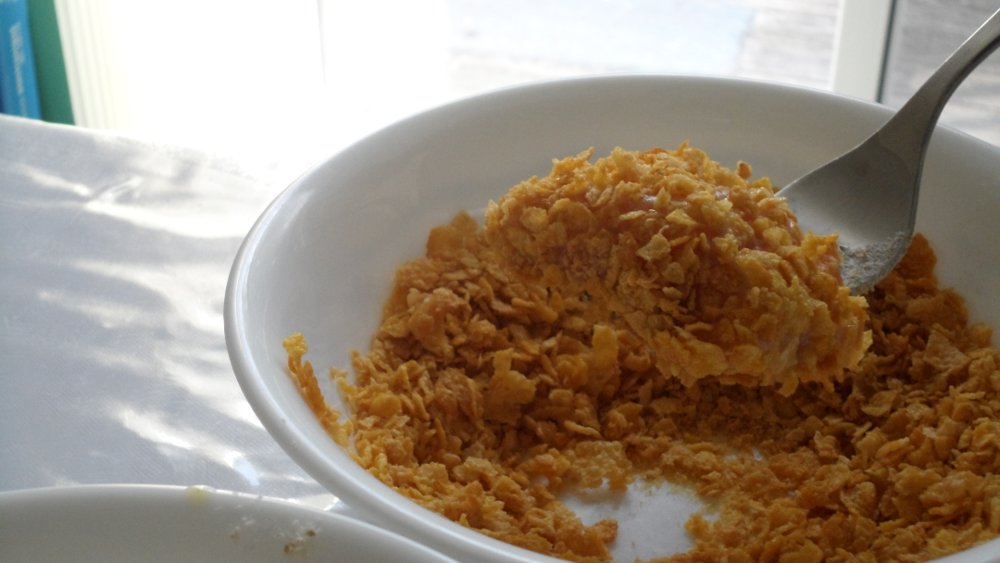
  • 150 ml corn flake crumbs.  either crush them yourself, or purchase a box of crumbs.  Alternatively, bread crumbs are acceptable but not as good.
  • 1 tbsp oil

The salmon pieces with the egg wash, crumbs (top right) and flour

To prepare:


  1. Preheat the oven to 225 C (475 F).  This dish does best in a hot oven.
  2. Scrub the potatoes or peel them.  We like to eat the peel, plus it's healthier for you.
  3. Slice the potatoes into fries.  Don't make them too small.  Put them into a large bowl, add the oil and toss gently to coat.
  4. Arrange the fries in a single layer on a cookie sheet.  Put in the oven and bake for 40 minutes.  Turn them over every 10 minutes.
  5. Get out three bowls.  Into the first bowl, mix the flour and dry mustard.  The second bowl, lightly mix the egg and some water into an egg wash.  The third bowl contains the crumbs.
  6. Coat the bottom of a baking dish with the oil.
  7. Rinse the fish well and pat it dry with paper towels.  Cut the fish into serving-size pieces.
  8. Here's the fun part.  With a fork, coat each piece with the flour mixture.  Shake off any excess.  Put the pieces into the egg wash.  Shake off the excess again, and dredge in the crumbs.  Then arrange the pieces in the baking dish.
  9. When the fish has been in for 40 minutes, then add the fish to the oven.  Let it bake for 10 minutes, and flip the pieces after 5 minutes.  The fish should be flaky.
  10. Serve while still piping hot.
The fish, coated and ready to bake
Coleslaw is a traditional side-dish for fish and chips.  Malt vinegar is a good topping for french fries, but ketchup is good for the younger ones.  Squeeze a wedge of lemon on the fish.  Tartar sauce is OK, too, but we prefer the lemon.

Note: I've made this many times.  Something with the potatoes eventually coats the cookie sheet, even if it is non-stick, so much so that the fries eventually stick to the pan.  I found my best strategy is to use a cheap pan and replace if occasionally.  Save your good cookie sheet for making cookies and other good stuff!

Does Bow-tie Calico approve?  She loves the fish, ignores the chips and really hates the wedge of lemon.

Bacon and Egg Breakfast Muffins


This is another favourite of ours.  It takes a little bit of time to prepare, but is oh-so-dee-lish.  We generally try to stick to having it for special occasions only, as there are quite a few calories in one of these.

Some of us may be familiar with this type of breakfast treat, from one or more of the American fast-food chains. Is this version better?  You decide.

This is not really the type of dish that needs a recipe, but it's amazing how many people have not thought of making it.  So, in the best tradition of stating the obvious, here we go.


Ingredients for each muffin
  • an English muffin
  • an egg
  • a slice or two of bacon.  Back bacon (aka Canadian bacon) is good too, and a slice of ham is another option.  Or skip the meat altogether if that's your thing.
  • A slice of cheese.  Swiss is good, but any other "meltable" cheese is fine, too.


Directions
  1. Cook the bacon. It should be put into a cold pan and cooked slowly until perfection.   For best results, it should be chewy and not very crisp.  Remove the bacon from the pan and place on a paper towel to drain.  Wipe out the pan and return it to the stove for the next step.
  2. Fry the eggs.  This can be done with a hotter pan than the bacon.  Partway through cooking, flip them over to help cook the yolk until it's just hard.  A minute or so before the eggs are done, top it with the slice of cheese so it melts just a bit.
  3. Optional: put some herbs and spices on the egg when it's first put into the pan.  We like freshly ground black pepper and dried basil.  But other flavours are good, too.  A little bit of cumin goes especially good with eggs.
  4. While the eggs are cooking, toast the muffins.
  5. Assemble the muffin.  Stack the egg and cheese on the muffin and top with bacon.


Enjoy.  You'll see why we think that this is a treat and loaded with calories because, really, who can eat just one?  We challenge you to try.

Even Bow-Tie Calico approves!